Window tinting is a popular modification for cars, offering benefits like improved privacy, reduced glare, and UV protection. However, there may come a time when you need to remove the tint from your car windows, whether due to legal regulations, damage, or a desire for a change. Here is a comprehensive guide on how to remove window tint from your car, including both DIY methods and professional solutions.
Understanding the Basics of Window Tint Removal
Removing window tint involves peeling off the tint film and cleaning the adhesive residue left behind. The process can be straightforward but requires patience and the right tools to avoid damaging your windows.
DIY Window Tint Removal Methods
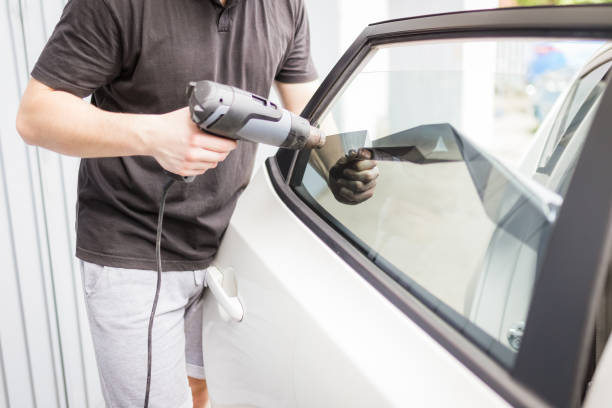
Using Heat
One of the most effective DIY methods for window tint removal involves using heat. Here’s how you can do it:
- Gather Your Supplies: You’ll need a hairdryer or heat gun, a razor blade or scraper, and a cleaning solution (soap and water or a commercial adhesive remover).
- Heat the Tint: Turn on the hairdryer or heat gun and aim it at a corner of the tinted window for a few minutes to loosen the adhesive.
- Peel Off the Tint: Carefully use the razor blade to lift a corner of the tint. Once you have a good grip, slowly peel off the film while applying heat to make the adhesive easier to remove.
- Remove Residue: After the tint film is removed, there will likely be adhesive residue left on the window. Spray the cleaning solution and use a non-abrasive scrubber to clean it off.
Using Ammonia and Sun
Another effective DIY method uses ammonia and sunlight:
- Prepare the Window: Cut garbage bags to the size of your window and spray the outside of the window with soapy water, then apply the bag to create a seal.
- Apply Ammonia: Spray the inside of the window (where the tint is) with ammonia, and immediately cover it with another piece of garbage bag to prevent evaporation.
- Let it Sit: Park the car in direct sunlight. The heat will help the ammonia break down the adhesive.
- Peel Off the Tint: After an hour or two, remove the garbage bags and use a razor blade to peel off the tint. Clean any remaining adhesive with a suitable cleaner.
Professional Window Tint Removal
If DIY methods seem too daunting or if you want to ensure a flawless finish, professional window tint removal is an excellent option. Professionals use specialized tools and chemicals that can remove the tint efficiently without damaging the glass.
- Consultation: A professional service will begin with a consultation to assess the condition of the tint and the windows.
- Removal Process: Technicians will use steamers or commercial-grade heat guns to loosen the adhesive, followed by precision tools to remove the tint and clean the glass.
- Cost and Time: The cost of professional window tint removal can vary, but it typically ranges from $50 to $150 per window, depending on the car’s make and model. The process usually takes a couple of hours.
Tips for Successful Window Tint Removal
- Be Patient: Rushing the process can lead to damage or incomplete removal.
- Use Proper Tools: Ensure you have the right tools and cleaning agents to avoid scratches or residue.
- Consider Professional Help: If the tint is old or particularly stubborn, professional removal might be more cost-effective in the long run.
Removing tinted windows for cars can be a straightforward DIY task or a hassle-free professional job. Whether you choose to tackle it yourself or seek expert help, understanding the process will ensure your car windows are clear and residue-free.